Getting Started - How To Play NHL '94
This page provides instructions to get you up and going on your computer. You can follow this setup to learn how to play against the CPU, and also get you ready to play online any player who questions your uncanny NHL '94 skills!!!
Requirements:
- Windows - Running 64-bit Windows 7-11
- Mac - supports Metal (generally a Mac from 2015 or later). Use this link to determine if your Mac supports Metal - Support for Metal for Mac
- Controller/GamePad - USB or Bluetooth controller. Note, USB or a wireless (2.4GHz) controller is preferred. Bluetooth controllers do add some input lag.
Netplay Requirements:
- High Speed Internet - Wired connection HIGHLY RECOMMENDED. Wifi connections tend to be very spotty, and are not recommended, but you can try. If you're unable to run an Ethernet cable, there are a few solutions like Powerline or MoCA adapters. Satellite Internet will not work.
- Genesis and SNES: Netplay is cross platform for both systems, using the cores provided in this package.
- Discord - Used for communication between players for netplay.
Need help? Or just want to keep up to date on all things NHL'94?
Join our Discord chat Server!! Click here -

Windows Setup
This guide will help you set up the NHL'94 RetroArch 1.17 package on Windows. The download package includes files for both Genesis and SNES.
-
Step 1 - Download the RetroArch Package: Windows Link

Step 2 - Extract and Save Folder
Extract the downloaded zip file and save the folder to a location you prefer. I recommend adding a shortcut to the desktop, or just saving the folder to the Desktop. Put it somewhere that is easily accessible.
Step 3 - Go to RetroArch Setup section
If you have a previous RetroArch NHL'94 package version installed, I recommend moving over the ROMs folder from the previous version to this one. Then, delete the old RetroArch folder. Do not bring over your retroarch.cfg file. The new package has specific network settings that may not be compatible with the .cfg of old versions. Also, its possible you will need to reconfigure your controller.
Mac Setup
This guide will help you set up the NHL'94 RetroArch 1.17 package on Mac. The download package includes files for both Genesis and SNES.
-
Step 1 - Download the RetroArch Package: Mac Link
Step 2 - Mount and Open DMG File
Double-click the downloaded DMG file (It should be located in your Downloads folder). You should see a disk icon called "RetroArch 1.17-Mac" on the Desktop. Double-click it to open.
Step 3 - Install RetroArch
First, drag the RetroArch app into your Applications folder. If you are updating from a previous version, choose "Replace" when prompted. Next, open the RetroArch app. You may need to right click on it in your Applications folder and choose "Open", depending on security settings.
Step 4 - Copy Over the RetroArch.cfg File
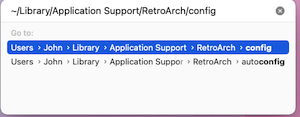
Close the RetroArch app. After quitting, go back to the RetroArch-Mac image (see above), Next, we need to copy in the retroarch.cfg file into the config folder. Click on the Finder icon on your dock. Click Go on the top menubar, then choose "Go To Folder..."

Type in (without quotes) "~/Library/Application Support/RetroArch/config" and hit Return. This will open up the RA config folder. Drag the retroarch.cfg file from the installer window, to the config folder. Choose "Replace" when prompted.

Step 5 - Copy Over the Cores and ROMs Folders
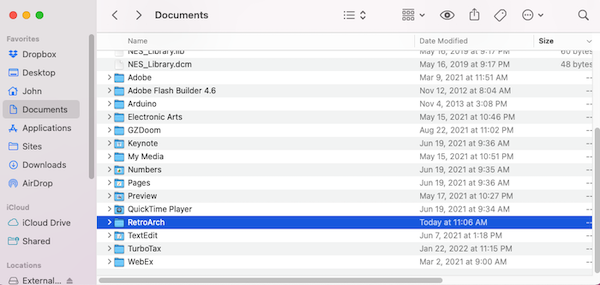
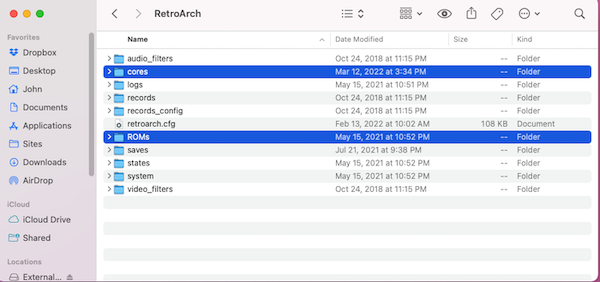
Close the config folder. Next, we need to add the cores and ROMs folder to your Documents/RetroArch folder. Open a Finder window, and navigate to Documents folder and open the RetroArch folder. Drag both the cores folder and ROMs folder from the installer, over to the RetroArch folder. Choose "Replace" if prompted. NOTE: If you are updating from a previous version of RA, you only need to replace the cores folder.
Step 6 - Switch to Rosetta Mode (M-series Macs)
NOTE: This step is only for M-series Macs. If you have an Intel Mac, you can skip to Step 7.
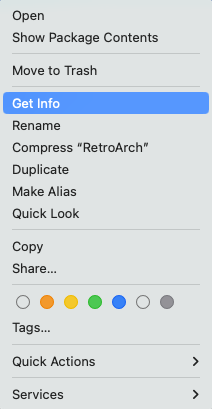
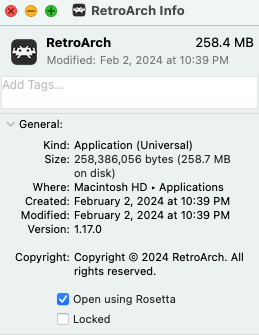
Open your Applications folder. Right-click on the RetroArch app, and select "Get Info". In the Get Info window, select "Open using Rosetta".
Step 7 - Run the Core Info Updater
RetroArch App Navigation Controls:
- Move Selection - Arrows on keyboard
- Select - ENTER key
- Back - Backspace key
- Exit RetroArch - ESC key
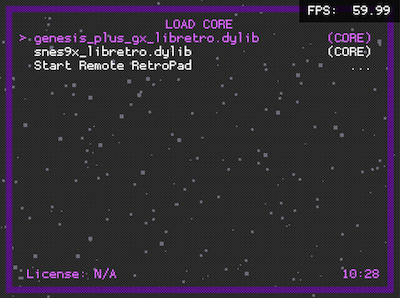
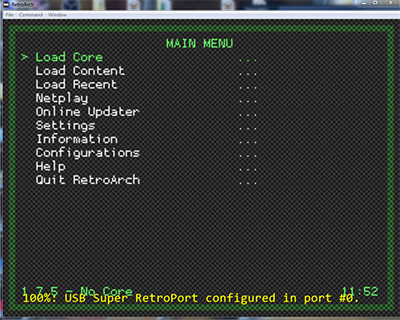
Open the RetroArch app. If you select "Load Core", you will see that RetroArch does not recognize the cores properly (just shows the filename, not the core name).
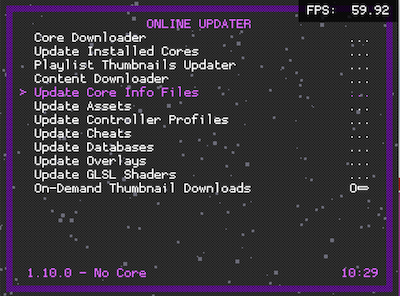
We need to update the Core Info files. Back out to the Main Menu. Select "Online Updater". In the Online Updater menu, select "Update Core Info Files".
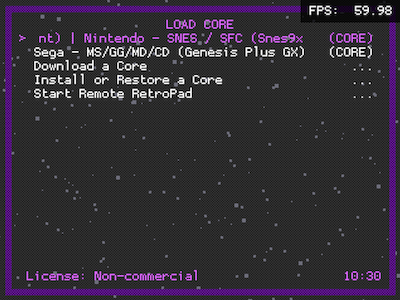
Once done (about 10 seconds), close the RetroArch app, and open it again. Now, if we select "Load Core", we should see the following, showing that it recognizes the cores:
Now, Mac installation is complete. Continue to the next section.
RetroArch Setup
This part of the guide will help you get started on using RetroArch. Current version we are using is 1.17.
Step 1 - Start the RetroArch App
Windows - Double-click on Retroarch.exe in the Retroarch-1.17 folder.
Mac - Click on the RetroArch app in your Applications folder.
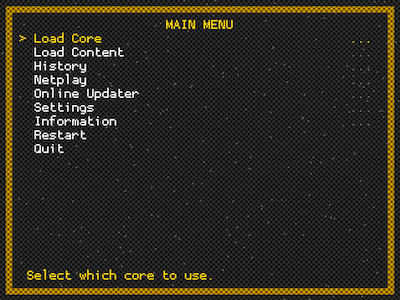
This will start RetroArch. Feel free to make a shortcut to this file where you would like. You should be at the Main Menu screen. NOTE: Some of these images may look different than what your screen looks like. The instructions are the same.
Navigation Controls:
- Move Selection - Arrows on keyboard
- Select - ENTER key
- Back - Backspace key
- Exit RetroArch - ESC key
Step 2 - Controller Configuration
RetroArch contains many common controller configuration files, so there is a very good chance your controller will work "out of the box". If this is the case, a similar message like the one shown below will be seen when you start RetroArch (as long as the controller is connected beforehand, or you will see it when you connect your controller after starting).
If you see a message that says "controller not configured", you will need to configure it manually. Follow the instructions in the link here: Controller Config Link
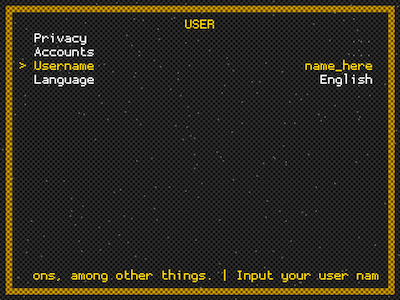
Step 3 - Set Your User Name
In RetroArch, go to Settings->User. Set a User Name. This only needs to be done once. Spaces are allowed, but do not use any special characters (like an underscore). Once you set it, please exit RetroArch and restart it so it saves your name.
Step 4 - Loading Core and Content
RetroArch is a frontend for emulation. So, in order to emulate, we need "cores". The cores included with the package you downloaded are Genesis Plus GX (GPGX) for Genesis, and Snes9x for SNES. The first step we need to do is load the core. At the Main Menu, select "Load Core". Then, choose the core you would like to use (Genesis Plus GX for Genesis, Snes9x for SNES). Once you select the core, it should return you to the main menu, and you should see the core listed at the bottom of the screen.
Once the core is loaded, we can now load the "content". The content, in our case, is the ROM. The ROMs in the package are located in the "ROMs" folder included in RetroArch, and are in 2 separate folders, Genesis and SNES. I recommend adding all new ROMs to these folders, for easy access in the future. Select "Load Content" from the Main Menu and you should see the following photo:
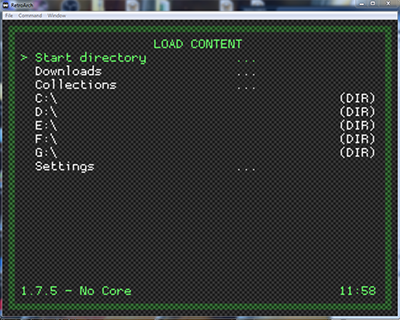
Select "Start directory", then select "Genesis" or "SNES", and select the ROM to play. Included in the package are the standard NHL '94 ROM, the playoff version (with a longer OT period), and a 2v2 ROM (2 skaters vs 2 skaters, good for 4 player play).
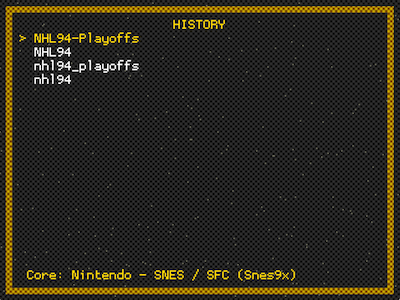
What's nice about RetroArch is that you only will need to do this once per ROM. The next time you wish to load the ROM, instead of loading the core and content separately, you just need to go to "History" on the Main Menu, and select the ROM.
Step 5 (Windows only) - In Case You Have No Sound
If you loaded the game ROM in the last step and got to the NHL'94 title screen, you should hear the game theme music. If you don't hear the music, then you need to download and install this file " directx_Jun2010_redist.exe" from Microsoft. Download the file, run it, specify an extraction location when it asks (make a folder for it first since it will extract ~50 files), and finally run DXSETUP.exe to install the sound driver.
Step 6 - In Game Controls
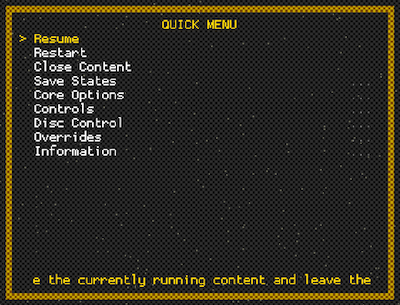
The Quick Menu (F1 key) during the game can be used to quit the game (Close Content), load or save a save state, restart, take a screenshot, start recording, and other options. It is also used to get back to the Main Menu (hit the Back button twice).
Important Hotkeys:
- Save State - F5
- Load State - F4
- Increase State Slot - F7
- Decrease Save Slot - F6
- Toggle Fullscreen - F key
- Toggle netplay hosting - N key
- Chat during netplay - tab key
- Reset ROM - R key
RetroArch is configured to automatically increment save state slots, so when saving a state, you do not need to hit F7 to increment to the next slot.